I almost forgot that today was Tuesday. Having the day off yesterday, kind of threw my week off. Sorry if any of you have been waiting impatiently.
I've decided to go with the name "desert blooms", so the winner is Nancy aka Homesclscrapper!!! Please email me your mailing information and I'll get your RAK out to you!
Thanks everyone who participated in my contest!!! Please stay tuned because I plan on doing many more of these!!!
Stephanie
Tuesday, January 18, 2011

Wednesday, January 12, 2011
A Lil' Bit of fluff
Good morning!! I received some exciting news yesterday. I had submitted some layouts to the Scrapbook News and Review online magazine, and I received an email yesterday saying that 4 of them were selected to be published in the Jan 16th issue! This is a first for me...so I'm pretty excited!!
Now, for my layout. This is my darling niece...who is now 17 years old. This is an old picture that I scanned and printed in order to scrap.

I created this layout for the monthly leftovers challenge at scrapbook.com, but I failed miserably. Everything here is made with leftovers and scraps, but the thing is, you aren't supposed to create anything new. Well, even though I did use scraps, I did create new flowers and a clothesline and a vine. I created a tutorial for these flowers, you can find it here. Check it out for a flower naming contest with a small prize for the winner.
The background was made with scraps of Basic Grey Two Scoops and Phresh and Phunky, and the alphas are from the Porcelain collection. The clothesline was cut with my Silhouette and I colored the garmet with colored pencils. The flowers were made out of the matching scraps of the Basic Grey paper. The bling was left over from a piece I had cut and used on another layout. All the little pink roses and the pearls and chipboard were from used packages.
The title is a play on my niece's nickname "Little Bit". As she got older, it evolved into just "Bit" and later "Bitter Bug" which is the one I still like to call her. She told us over the holidays that we weren't supposed to call her that...and I told her, taking our nickname for her away from us was taking a little piece of our heart away. She has decided that family can still use her nickname! She is a sweetie and I am soo proud of the young lady she has become!
Stephanie
Monday, January 10, 2011
Desert Blooms Tutorial
This is old information, no longer relevant to the tutorial, but keeping it here so people know why I was given suggestions on flower names!: OK....don't you just love the oh so original name of my flower? I confess...I'm totally out of any ideas on what to name the flowers I make. I have several tutorials I've created, but I haven't put them online b/c I just don't know what to name the flowers.
Here's what I'm going to do...I'm going to hold a flower naming contest from now on...and the winner will receive some of my handmade flowers...and maybe if I really like the name...I'll throw in a bling design too!! Just leave me a comment with your idea for a name and I'll pick a winner one week from today (if I had more responses...I'd probably pick a winner sooner...so we'll see how this first one goes.)
 Supplies needed: Heat gun, water bottle, 2" & 1" retro punches, ink & applicator, mousepad, stylus, glue, and hole punch (just the regular office kind). In my little container is Aleene's tacky glue...I like to apply it with a toothpick to get in the small spaces.
 I punch 3 - 2" flowers and 4 - 1" flowers
The 1" will be the bud, I like to punch half a hole out of the tips and then ink them. This creates a nice texture for the bud.
 I just thought I'd sneak this pic in real quick. I love these little rosebuds. I make them just like the bud I'm getting ready to show you, except I use 5 - 1" retro flowers.
 For the very center of the bud, I use a mousepad and stylus. Gently crinkle the inside of the tips of the petals, then press down into the center of the flower to draw the petals up. Add a bit of glue to the inside tips of the petals, then roll it between your fingers to make the bud.
Tip: I will make sure that one side of each petal is on the outside of the next petal before rolling to give it a nice finished look.
 On the right is the bud we just created.
The 2nd layer, I curl the left side of each petal inward and the right side outward. Place glue on the left inward curl and in the center, then place the small bud inside and wrap it around and hold in place.
Tip: You may want to wait and curl the right side back until after you have glue it around the bud. You can use tweezers to pull it down, but its easier that way to get it to stay around the bud.
 On the right, is the two pieces you just created above.
The last 2 layers (or if you are just making a rosebud, the last 3), curl the tips of the petals back, press down into the center with stylus to draw the petals up. Place a tiny bit of glue on the inside of each petal and the center, then layer under the bud alternating the petals.
 Here is the finished bud/center.
Another reason I love the Aleene's tacky glue is that it dries clear!!
 3 - 2"
Spritz lightly with water. Hold the back of the petal on your thumb and press the tip of the petal over the end of your thumb for the curled back effect.
Then, press your finger or the small end of a paintbrush into the front center of the petal, and from the backside, pinch the petal around the paintbrush.
 Here's a picture from the side to see the dimension and detail on each petal.
You can press into the base of the flower to draw the petals up.
Use your heat gun to dry the flower.
 Glue the 2" layers together alternating petals, then glue the bud into the center. Here is the final flower.
 Here's another view from the side. They don't sit too high off your page...so not too much bulk.
These are the Prima flowers that I got the inspiration from to make these flowers.

 I also did these flowers using a 6 petal flower punch and 4 - 1" retro punches.
Make the bud the same as you did above.
On the 6 petal flowers, cut between the petals a bit if they are like this. Follow the steps above. The only difference with these is that after I shaped it, I pressed into the base of each petal to draw it up and cause it to overlap the next petal.

This is the finished flower using the 6 petal flowers.
On the bottom pink one, I did the bud a bit differently. Instead of curling the petals backward, I used a mousepad and stylus to gently crinkle the backsides of the petals, then layered and glued them.
Here's what I'm going to do...I'm going to hold a flower naming contest from now on...and the winner will receive some of my handmade flowers...and maybe if I really like the name...I'll throw in a bling design too!! Just leave me a comment with your idea for a name and I'll pick a winner one week from today (if I had more responses...I'd probably pick a winner sooner...so we'll see how this first one goes.)


The 1" will be the bud, I like to punch half a hole out of the tips and then ink them. This creates a nice texture for the bud.


Tip: I will make sure that one side of each petal is on the outside of the next petal before rolling to give it a nice finished look.

The 2nd layer, I curl the left side of each petal inward and the right side outward. Place glue on the left inward curl and in the center, then place the small bud inside and wrap it around and hold in place.
Tip: You may want to wait and curl the right side back until after you have glue it around the bud. You can use tweezers to pull it down, but its easier that way to get it to stay around the bud.

The last 2 layers (or if you are just making a rosebud, the last 3), curl the tips of the petals back, press down into the center with stylus to draw the petals up. Place a tiny bit of glue on the inside of each petal and the center, then layer under the bud alternating the petals.

Another reason I love the Aleene's tacky glue is that it dries clear!!

Spritz lightly with water. Hold the back of the petal on your thumb and press the tip of the petal over the end of your thumb for the curled back effect.
Then, press your finger or the small end of a paintbrush into the front center of the petal, and from the backside, pinch the petal around the paintbrush.

You can press into the base of the flower to draw the petals up.
Use your heat gun to dry the flower.

These are the Prima flowers that I got the inspiration from to make these flowers.


Make the bud the same as you did above.
On the 6 petal flowers, cut between the petals a bit if they are like this. Follow the steps above. The only difference with these is that after I shaped it, I pressed into the base of each petal to draw it up and cause it to overlap the next petal.

This is the finished flower using the 6 petal flowers.
On the bottom pink one, I did the bud a bit differently. Instead of curling the petals backward, I used a mousepad and stylus to gently crinkle the backsides of the petals, then layered and glued them.
OK...that's my latest tutorial! Now...name my flowers!! Thanks for looking and have a great day!!
Stephanie
Layout of Dakota & Some more bling for my Etsy shop.
WOW...my first layout of the new year! It's been slow going for me...just haven't had much mojo. I used Basic Grey Granola PP on this LO...it was the very first pack of Basic Grey paper I had ever gotten and these pics are perfect for it. I wet distressed the edges of the PP. I cut the tree with my silhouette and then painted and inked it with brown acrylic paint (from Walmart) and black distress ink to create the look of the tree.

All the leaves were made with Heartfelt Creations Bold Falling Leaves Precut Set, Open Falling Leaves precut set, and the Falling Leaves Die. I cut and stamp differently than the tutorial on the Heartfelt Creations website. Maybe one of these days, I'll do a tutorial on it. I cut all the leaves out first using the die. Then, I place the stamp on my table and ink it, line up the image on top of the stamp by just laying it on it, then I take a clear stamp block and press down on the paper on top of the stamp for my image. I find this easier than trying to line up the stamped image with the die. After I cut and stamped, I just crumbled them for a more realistic look.
The flowers were made with the Tim Holtz Tattered Florals Die. I used 2 of the spindly ones, 2 of the med 6 petal and 2 of the smallest 5 petal. Before making the flowers, I inked each layer with multiple colors of distress ink in tea dye, peeled paint, and forest moss to blend it with the picture colors.
I bought the butterflies from Lisa's (Featherrs) Etsy Shop. I love how they matched the theme of the layout and the colors blended so perfectly!
Here are a couple of sheets of bling I just listed in my Etsy shop. I've gotten so busy making flowers, I forgot how beautiful the bling was!

Thanks so much for stopping by! I'm going to be putting a flower tutorial up hopefully today, maybe tomorrow...so stick around for that!
Stephanie
Tuesday, January 4, 2011
Thank you card for a special Christmas gift
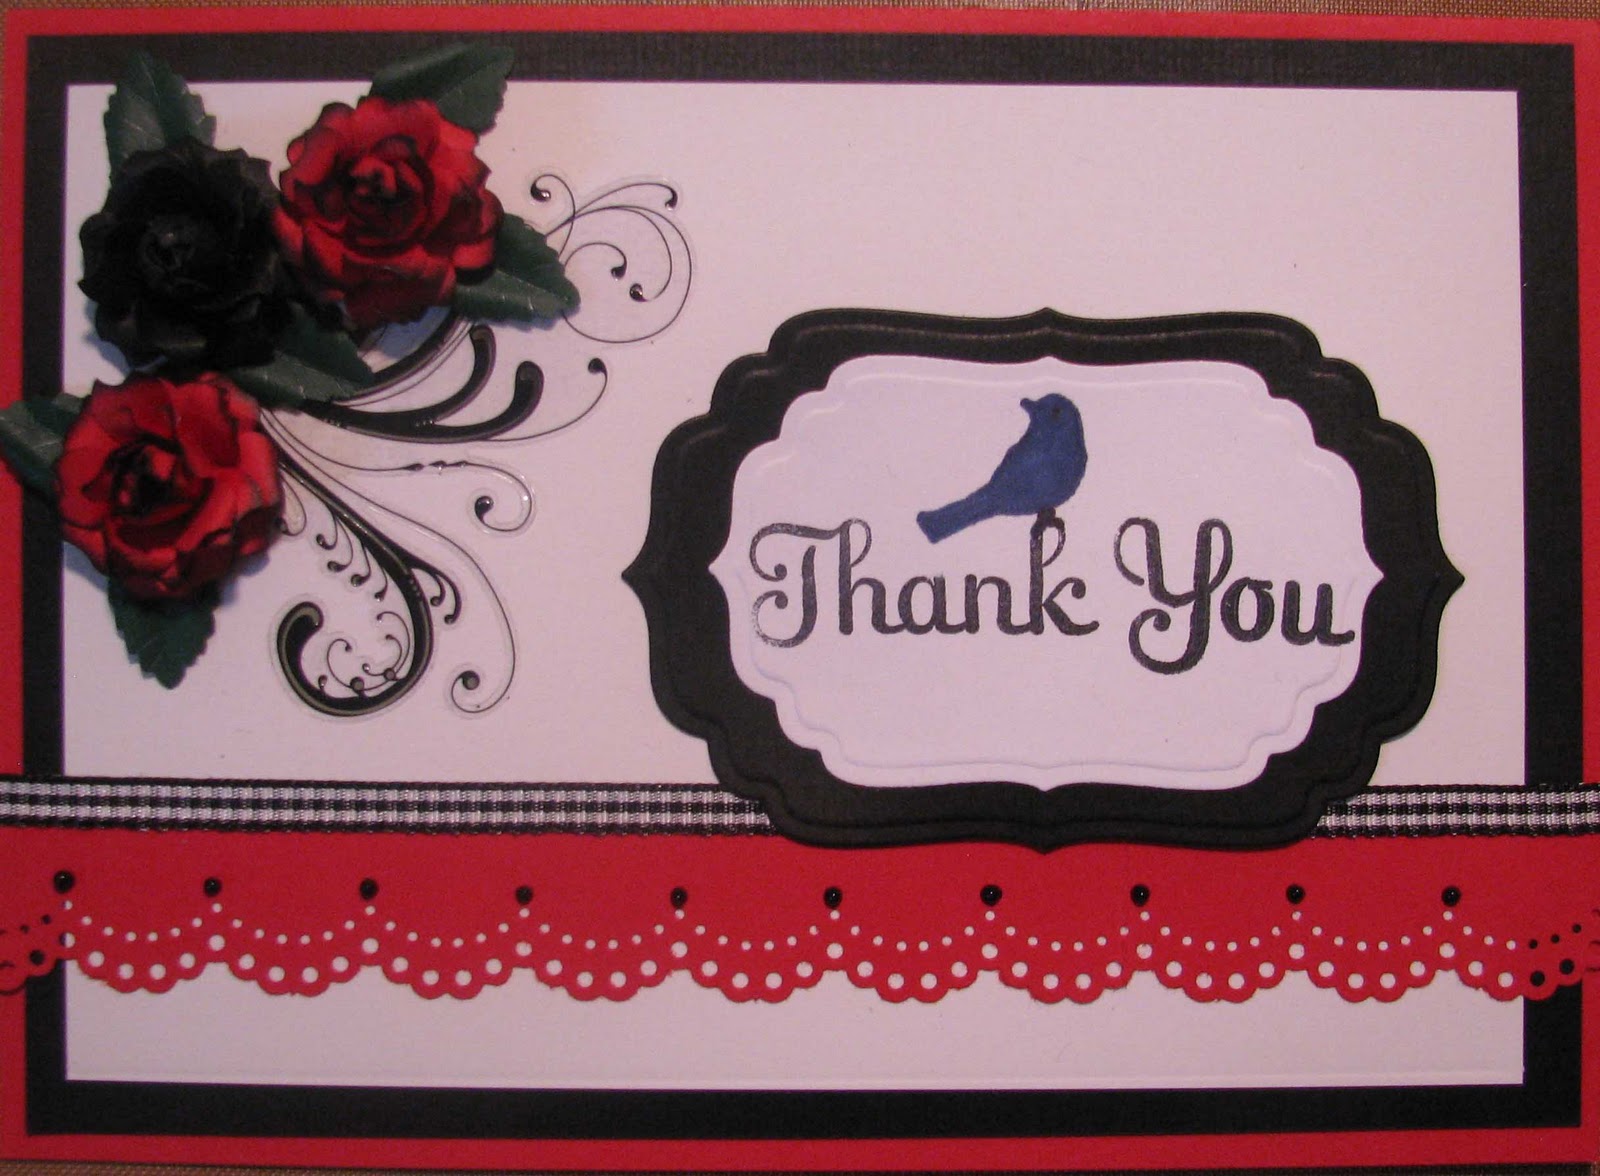
Good morning & Happy New Year! Yes, I'm a little late on the Happy New Year...but I've just gotten around to my frist post this year! I have had absolutely no mojo in the last couple of weeks and no desire to sit at my scrap table and do anything! I did get this card done for my avon lady, who just happens to be my mom too. She gave me some Avon gifts as a thank you for being a customer for the year.
I did the card in red and black, since her favorite color is red and I used the thank you stamp with the bird, b/c she loves birds...probably b/c her name is Robin...lol I used my new Spellbinders Labels die and Spellbinder Grand Calibur to cut the frame for the sentiment. The flourishes are a sticker. I made the roses myself using 5 small retro punch-outs. I love these roses...so delicate and pretty! The leaves I have a birch leave punch for, I embossed lines down them, then shaped. I used Martha Stewart Doily lace border punch and added some black puffy paint for bling.


I did the card in red and black, since her favorite color is red and I used the thank you stamp with the bird, b/c she loves birds...probably b/c her name is Robin...lol I used my new Spellbinders Labels die and Spellbinder Grand Calibur to cut the frame for the sentiment. The flourishes are a sticker. I made the roses myself using 5 small retro punch-outs. I love these roses...so delicate and pretty! The leaves I have a birch leave punch for, I embossed lines down them, then shaped. I used Martha Stewart Doily lace border punch and added some black puffy paint for bling.

Hopefully, soon, I will be in the mood to create a layout soon! I hope you all had a great New Year's Eve and I wish you all many blessings in the new year!
Stephanie
Monday, December 27, 2010
A straggler tag and "dirty work"
On Christmas Eve, I realized I was one tag short, so I made this one real quick. I inked a tag with stormy sky distress ink. Then I inked the T.H. snowflake embossing folder with faded jeans and embossed the tag. I outline the snowflakes with puffy paint and sprinkled with glitter. When it was dry, I heated it to puff it up. The reindeer is from the T.H. die Reindeer flight, I cut it out of MME Christmas paper. I hot glued the berries around his neck, since I didn't have the little wreath stuff like T.H. (he has all the best products, lol). I stuck a sticker that says Happy Holidays on the fancy shape and applied it with hot glue.

Here's a layout I made right before Christmas for the leftovers challenge hosted by Pat at scrapbook.com Everything here is a left-over, there are no new products used or made! On the frame and letters, I took some diamond dust, sprayed with tattered leather glimmer mist, then glued it on to make it look like dirt. I also added some to the circles. The letters are inked with antique linen and walnut stain to look dirty. On two of the circles, I took some pieces of scrap cloth, tore it and glued it on. Added some of the same cloth and some twine in misc spots around the pics. On two of the circles, I used crackle accents, just to use them. The pics of are Paul and Elias working on the water lines for Paul's new shop.

Thanks for looking and have a wonderful new Year!!!
Stephanie
We had a white Christmas!
On Christmas Eve, it started snowing and snowing and snowing...and it didn't quit for the better part of the day! We went to my parent's that night and the hour drive home took us almost 2 hours! The roads were terrible!!! Paul took Elias out on the 4 wheeler to ride in the snow a little bit. Elias barely let me get this picture before running to the 4-wheeler.

You can barely see Elias and Paul in the shop getting ready to get on the 4-wheeler. This is how much the snow was falling.

I had to take some scenery pictures...it was just so pretty out there...even though I don't like the cold! Too bad we can't have warmth and snow!


Stephanie
Subscribe to:
Posts (Atom)