Monday, December 27, 2010

A straggler tag and "dirty work"

On Christmas Eve, I realized I was one tag short, so I made this one real quick.  I inked a tag with stormy sky distress ink.  Then I inked the T.H. snowflake embossing folder with faded jeans and embossed the tag.  I outline the snowflakes with puffy paint and sprinkled with glitter.  When it was dry, I heated it to puff it up.  The reindeer is from the T.H. die Reindeer flight, I cut it out of MME Christmas paper.  I hot glued the berries around his neck, since I didn't have the little wreath stuff like T.H. (he has all the best products, lol).  I stuck a sticker that says Happy Holidays on the fancy shape and applied it with hot glue. 


Here's a layout I made right before Christmas for the leftovers challenge hosted by Pat at scrapbook.com  Everything here is a left-over, there are no new products used or made!  On the frame and letters, I took some diamond dust, sprayed with tattered leather glimmer mist, then glued it on to make it look like dirt.  I also added some to the circles.  The letters are inked with antique linen and walnut stain to look dirty.  On two of the circles, I took some pieces of scrap cloth, tore it and glued it on.  Added some of the same cloth and some twine in misc spots around the pics.  On two of the circles, I used crackle accents, just to use them.  The pics of are Paul and Elias working on the water lines for Paul's new shop.
Thanks for looking and have a wonderful new Year!!!

Stephanie

We had a white Christmas!

On Christmas Eve, it started snowing and snowing and snowing...and it didn't quit for the better part of the day!  We went to my parent's that night and the hour drive home took us almost 2 hours!  The roads were terrible!!!  Paul took Elias out on the 4 wheeler to ride in the snow a little bit.  Elias barely let me get this picture before running to the 4-wheeler.


 You can barely see Elias and Paul in the shop getting ready to get on the 4-wheeler.  This is how much the snow was falling.
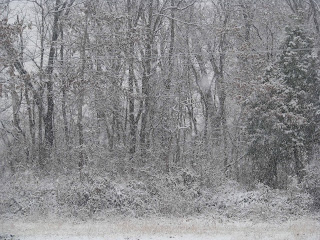
I had to take some scenery pictures...it was just so pretty out there...even though I don't like the cold!  Too bad we can't have warmth and snow!


 I got Shelby & Dakota to bundle up and take some pics.  It was hard to get some b/c right when I snapped the picture, a snowflake would be in front of their eye or nose and the pic would turn out funny, but I got a few good ones!

 I love Dakota's smile here....Paul wouldn't quit throwing snowballs at me and the kids when I was trying to take their pics.  I got him good though, b/c when he bent down to get a snowball, I pushed him face first into the snow...........then I took off running for the house!!!  LOL


I hope all of you had a very Merry Christmas and I wish you many blessings in the New Year!
Stephanie

Tuesday, December 21, 2010

On the Verge

I finally got all my Christmas projects done and I was ready to do a layout!  I wanted to do something totally opposite Christmas and red and green...something to remind me of warmer days! 

Here's another pic I took of Shelby back when I took the family pictures at the lake.  I wanted to name it "Twiggy" since she's sooo stinkin' skinny, but she said no.  So, I named it "on the verge", since as she is getting  close to 13, she is on the verge of many things! 

The flowers are handmade by me with some diamond dust sprinkled on.  The 3 on the right is my own twist on the Prima style flower by Rachel and the one in the bottom right is my Glittered Peony. The flourishes were cut on my sil and I glittered with stickles.  I made the bling directly on the layout this time.  Did some wet distressing on the edges, then dipped the edges in midnight blue glimmer mist.  Added a feather and butterfly.  The title was cut with Neon Mini alphabet strip for the Sizzix.  


Supplies:
 Core'dinations Vintage Collection Flower Power CS
Cherry Arte Vanilla Vintage - Vintage basket & Vintage Posy
Distrezz-it-all
Midnight Blue & Marshmallow Glimmer mist
Worn Lipstick & Chipped Sapphire Distress Ink
Sizzix Neon Mini Alpha die
Sizzix Flower Layer 3 die
Retro Punches
Diamond Dust

Saturday, December 18, 2010

Christmas projects and other items - I'm FINALLY done!!

Well...I've finally finished my decorated boxes for Christmas gifts.  I'll fill them with cookies and candies and give them to daycare workers and teachers.  My sister is making all the cookies and candies...and she is very talented...so I know the recipients will not be disappointed!

The paper is My Minds Eye.  I made the 3 red flowers myself, sprayed with glimmer mist, sprinkled with diamond dust.  The other embellishments are from Walmart, Michael's, and various other places.  The three roses are sprayed with Heirloom Gold perfect pearl mists.  I decorated from the wrong side of this box, so you can see the seam on the side...but oh well.

 This is the largest box I made.  It will be for the entire daycare.  I stickled the foam snowflakes with icicle.  The paper is My Mind's Eye.  I cut up a paper doily and scrunched it in the middle to add some fullness.  The flowers are mostly made by me, but there are a couple of Prima roses in there.  I have to thank Jennaroo at Held Scraptive for her tutorial on the DIY Prima glistening Vines.  Instead of the branches, I applied the tutorial to handmade vine swirls using wire and floral tape.   I love that I can make them in any color and add glitter. 

I'm not really happy with the cluster on this box...maybe I just need to add more and fill it out better.  My center should probably be higher and tapering out towards the edges more...so maybe I will re-work it if I can get the glue undone.


 I've made 6 tags to put on Christmas gifts to the grandparents.  I've applied a variety of techniques to the tags.  The birdhouse has white liquid applique on it and when you heat it after it is dried, it puffs up and looks like snow.  I used the white signo pen for Santa's beard on the middle one. 
 The middle snowman, I embossed some plastic, put it on him, then covered in crackle accents.  Its an idea from Tim Holtz' 12 tags of Christmas day 10.  The first snowman I colored with pencils using odorless minerall spirits.  I embossed the white snowflake design.  At the bottom of the 2nd tag, I used snow tex...that stuff is so cool!
 Of course...what December is complete without a birthday!  My niece's is the 22nd and my mom the 31st.  I made this card for my niece.  I colored the balloons with pencils and odorless mineral spirits, then fussy cut them out.  The border piece is a 12" border, I just cut it down to size.
 I wanted to show off the bling I made for a custom order! 


I hope you are all having a wonderful Saturday!!  Enjoy your weekend and thanks for stopping by!!


Sunday, December 12, 2010

Christmas projects cards & boxes

Good morning...barely!  I woke up this morning to an inch of snow on the ground and it hasn't stopped yet!  I don't care for winter as I don't like the cold, so even though the snow is beautiful...I'm already dreading having to go to work tomorrow in it!  The news people said 2-3" for the day, but we've already surpassed that and it still is coming down!!  Ugh!!

This past week, I've been busy getting things ready for Christmas gifts.  I thought I'd share them with you all.

These first 2 cards, my daughter, Shelby, made.  She did a really good job on them and I barely helped her!


The first card here, I don't like very much, but I'll use it.  I embossed the happy holidays in the Tim Holtz styled labels die shape, then used glitter to highlight it, but you can't tell it in the picture.  The 2nd card with the snowman I made last year, but never gave it to anyone, so I'll give it this year.

 These 2 are my favorite.  I had some help with a sketch on the 2nd one from cardmaps.  The first one was all my own ideas.  The santa is stamped on a piece of grungepaper and I covered his beard and hat in some fluff.  I love the way it turned out.
 I bought some plain white boxes from Walmart to decorate.  This whole piece is just the lid that fits completely over the box.  I covered them in patterned paper and then decorated the tops.  All the flowers except on the blue one are my own.  The 3 big ones on the blue one are Prima flowers I glimmer misted.
 I took apart craft picks that I bought at Walmart and Michael's to decorate with.  On the one above and the one below, Paul found me some fake snow that I glued on.  I stickled some foam snowflakes for the bottom one.  I made some of the sprigs myself using wire and floral tape then glittered with paint.
 The red and green curlies are made from paper. I just cut strips, wet them, wrapped them around a paintbrush and dried them.  The box below was my first one...a little more plain than the others...but I still like it.
 This blue one is my favorite!  I love blue...its my favorite color.  I used snow tex on this one to create the effects of snow.  Glued some of my handmade bling on it and added a doily and some ribbon.
I have 2 more boxes to decorate.  I'm having my sister bake some cookies and make some candies and I'll fill these up and give them to the daycare workers for gifts.  All of these boxes have lots of glitter and shine.  The recipients can keep them to decorate with or use them to give someone else a gift!

I still have to make tags for gifts and a birthday card that I'm already 2 days late on!  There just doesn't seem to be enough time for anything!!

Hope you all are having a wonderful Sunday!  Thanks so much for stopping by my blog today!!

Stephanie

Saturday, December 4, 2010

My 2nd Desktop Calendar

I finished another desktop calendar...not sure what I'm going to do with these...but I like making them!

I also used K & Company Roam patterned paper for this one. I water distressed the yellow and brown pieces then hot glued them on.  The tree was a stamp I colored with coloring pencils, embossed with clear powder, then fussy cut out.  The three mini roses were white and I misted with meadow glimmer rmist and kiwi perfect pearl mist.  You can find mini roses in my Etsy shop, link is on the right sidebar.  The larger flower was made out of matching CS and I put some diamond dust on it...its a new design I have come up with and I'll get a tutorial up soon....that is, if I can come up with a name for it. 

The bird was also a stamp that I stamped on the same paper as the flower, embossed using aged mahogony distress ink and clear embossing powder, then fussy cut out.  The little piece of burlap, the 3 leaves, and the basket of fruit are all stickers.

I have mixed feelings about this...I love it, but I don't, but I'm not sure why...LOL  DD says she just doesn't like the basket of fruit...maybe that is it...but I was going with a summertime theme for this...so it seemed to go and it is a pretty little sticker with glitter...lol

The calendar I made in Microsoft Word.  If you'd like it to use, just let me know your email address and I'll mail it to you.  I just used brads to hold it on to the brown piece, then hot glued the brown piece.


 This is the side shot of what it should look like.  I used the cardboard backing off a pack of patterned paper.  I cut it in half for 2 6 X 12 sheets (2 calendars).  I cut 1/4" off the bottom, so I could wrap paper around the entire length (I think the back and side look a lot better this way).  I put my paper on, fold the sides, top and bottom, like you are going to glue it down.  This will create a little square in all 4 corners, use an exacto knife to cut that out then fold your sides again and adhere to the back.  I took another piece of paper that was 6 X whatever length (but at least 6" long) and adhered that to the back, so it covers up where I folded the sides and top.  You'll see that on the bottom pic. 

I scored the lenth at 6", 7 1/2", and 9".  The 6" score line you will fold back, the 7 1/2" score line fold forward, the 9" score line fold back.  As you can see, the brown backing piece on my bottom part buckled up, but that is OK.  If anyone wants to be that picky, then I just won't give them a calendar LOL.  .

Use hot glue (or something really strong) to glue the edge of the length against the back of the calendar.  This one sits a little straighter than my last one, which I like better...but it's not straight up and down.  I glued the edge probably about 2" up from the bottom.

If you have any questions, please feel free to ask!  If you make a calendar...I would love to see it, so leave me a link!!!
Now, I'm off to work on Christmas cards (ugh...don't like cards) for the mailman and the daycare/pre-k workers!  As always, thank you for looking and have a wonderful weekend!!!

Thursday, December 2, 2010

Desktop Calendar

Whew...it's been a busy day!  Who would've thought I'd go to work...and actually have to work??? LOL  Sometimes, it is difficult to put aside my scrapbooking life and earn my paycheck.  Today, I worked on helping them move boxes of files from the old office to the new office that we've been in for 4 years now! LOL  But...they have gotten to build a new house and they have sold their old one...so yay for them!!!

My first altered project is this desktop calendar. I got the idea to make this from Cheryl @ http://sweeetdesignsbycheryl.blogspot.com/.  I didn't take individual pictures of the steps to create it, because to be honest, I wasn't sure it was going to work.  I used the backing on a pack of PP, the cardboard piece and cut it in half to be 2 6 X 12 pieces (you can make 2 calendars...lol!).  I scored it at 6", 7 1/2" and 9".  Then I folded it along each score line.  The reason for the 7 1/2" fold is that when you set it up on the desk, that 3" piece would sit flat on the desk and not straight, so DH suggested folding that bottom piece to give it more stability.  So...you'll have 3" that sit along the bottom (with a fold upwards in it) and you'll bring the last 3" of the piece up and glue it to the back of the 6" piece.  Make sure the 6" piece sits at an angle, otherwise it will look silly.  I'll take pics of this on my next calendar so you can see if I'm not explaining it right.  I used hot glue to glue the back of it.

BUT...before you glue the back, add your patterned paper to the base.  On this one, I only added patterned paper to the 6" piece, then added a 6" by 6" piece on the back to make it pretty.  On the one I am working on now, I cut about 1/4" off the cardboard piece and wrapped patterned paper around the whole thing, so the back piece would look nice.  I still only added a 6 x 6 back though.

The flourish I cut with my bigkick, inked the edges in vintage photo, then put antiquities embossing powder on it.  The flower started out as Natasha's vintage blooms (link in the right side bar), but ended up taking on a life of it's own.  The leaves I cut with spellbinders die and stamped the heartfelt creations open falling leaves on it.  I then sprayed with copper & green ivy glimmer mist.  The leaves in front of the swirl are also the spellbinders die, I just hot glued wire to the backs of them.

The calendar I made in Microsoft Word.  If you'd like the file, please let me know and I will be happy to share it with you.


As always, thank you so much for stopping by and have a great day!!
Stephanie

Sunday, November 28, 2010

Loving' You is so Easy

Well, it's been a lazy Sunday for me.  We went to church this morning, followed by a quick trip to Walmart for some juice and dishwasher soap, then we came home put on our pajamas and vegged out in front of the TV.  I took a small cat nap, but I'm finally ready to get some stuff done.

This LO was for the November Leftovers challenge at Scrapbook.com.  Everything I used on this is leftover pieces of paper and leftover packages of embellies.  I took each background piece of paper, stictched twice around the edges with my machine then glued them together.  The flowers are all handmade by me out of scraps of paper.  I put some diamond dust and glimmer mist on some.  I'll try to get a tutorial up soon for them.  They are just another rose, but they are made a bit differently than the other tutorials I've seen.  No cutting out a petal or two. 

The title was printed and cut on my silhouette.  The outer frame on it I used pop dots to give it some dimension.  The journaling strips were printed in Microsoft Word and cut out and inked with Tim Holtz Distress Ink Broken China.  The leaves are a stamp from Heartfelt Creations that I practiced my coloring pencils on.  I used just some cheap Roseart colored pencils, odorless paint thinner and cotton balls to color them in.  I'm really starting to like how that works and next on my list is some Prisma coloring pencils.

Here is the layout along with some close ups.  Journaling reads: Your little upturned nose & precious painted toes.  Your silken curls & twinkling eyes, a beautiful smile that lights up the skies.  All of this & so much more makes loving you so easy!  You bring such joy & happiness into my life & I am so blessed that God gave you to me!  Love, mom


 Thanks for looking and have a great day!!

Thursday, November 25, 2010

DIY Background layout

Happy Thanksgiving to all of you!!  I hope it is a wonderful day and you have bunches of delicious food to eat!

My latest layout is for the Do-It-Yourself challenge at scrapbook.com hosted by Wendy G.  This is for the background paper category, and I tried some new techniques on it.

The background paper started out as white cardstock.  I first lightly sprayed with pink bubblegum glimmer mist to add a subtle color.  I then took a Prima Donna Downey large Stem Foam Stamp covered it thickly in FolkArt Baby Pink acrylic paint and stamped it on my background.  I poured clear UTEE over the stamped paint, shook off the excess and heated it up.  It came out really cool...some parts of it shiney and some raised and bubbly.  I then took the Heidi Swapp Mega Heart Mask and Heidi Swapp Mini Butterfly mask, along with some paper flourishes...layered them on the sheet and sprayed with Chalkboard strawberry shortcake glimmer mist.  I took the Tim Holtz Flourish mask, layered it on the upper corner and sprayed with Patina glimmer mist.  In the upper left corner, I stamped some flourishes and wet distressed the 2 bg pieces of patterned paper.

I took a doily and cut it apart and inked the edges with Tim Holtz Worn Lipstick Distress Ink to layer it under the pic and in the corner.  The PP is Basic Grey Two Scoops.  I cut apart a (gasp) store bought bling to layer along the edge.  Added some chipboard pieces, heart stickers, and white pearls to my cluster.   The flowers are all from Prima...trying to use up my old stash since I make my own now and prefer to just use them.

The picture is my DD when she was just about a month old.  Boy, how the time flies!!  Here are the pics and a few close-ups!


Thanks so much for looking & I hope you have a wonderful day!  Happy Thanksgiving again!